
-
Schedule an Event
Once logged into MYeSCREEN, select: Scheduling, then Schedule an Event.
Image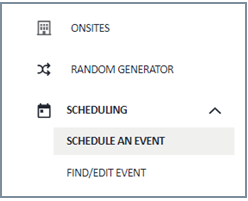
-
Search for Agency
Choose your Account (agency). Select search.
Image
-
Enter a Reason for the Test
Enter a reason for the test. The most often used reasons are pre-employment and random. Do not choose periodic, medical, diversion or transfer. These options are for non-federal regulated tests.
Image
-
Select the Type of Test
Next select the type of test. It is important to first select DOT federal test, then DOT urine and then HHS or HHS regulated test. Choose the DOT respected agency if the test is regulated by the DOT.
Image
-
Enter Donor's First Name and Last Name
Enter the donor's first name and last name. If entering the donor’s Social Security number, remember to enter four zeroes followed by the last 5 digits of the Social Security number. If you do not enter the donor’s DOB, email address or telephone number that information will be collected from the donor at the collection site.
Image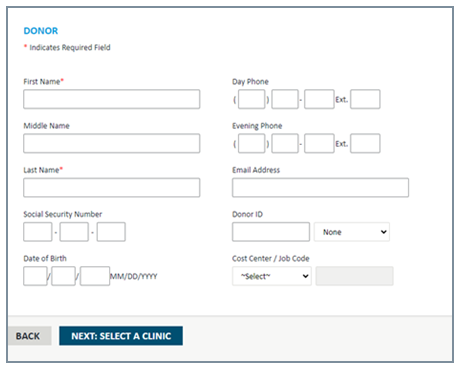
-
Select Clinic
Click: “Next: Select Clinic”.
Search for a collection site. Enter the donor’s zip code and search radius. It is recommended to the search radius within 25 miles. However, maximum search area is 60 miles. In the event there are no available collection sites within the area, reach out to Abbott at fedsupport@abbott.com for assistance.
Image
-
View Collection Site Details
Once you choose a collection site, click directly on the site name to complete this step. Clicking the small down arrow next to “show details” will display the collection site address, phone number, and hours of operation.
Image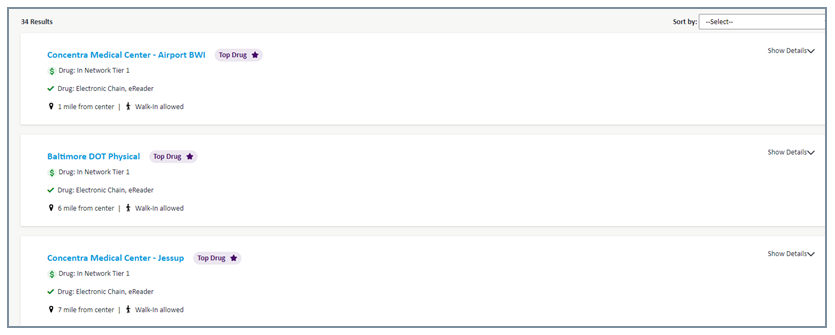
-
Set Expiration Date
Set an expiration date for the donor to complete the test. Upon notification, employees who are selected for random testing should report immediately. Applicants should report for their pre-employment test within 48 hours of notification. You can select a longer time frame for the test to stay active and select “Do Not Display Expiration Date” so the donor doesn’t think they have more time.
Image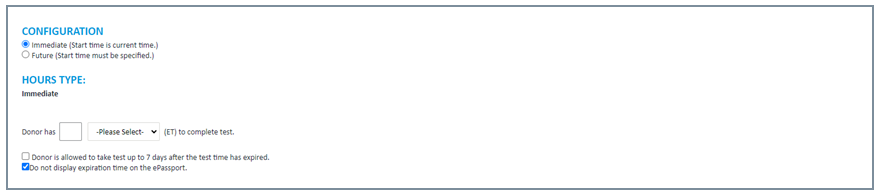
-
Enter Contact Information
You can then add your contact information and additional notes or information that you want printed on the ePassport for the donor.
Image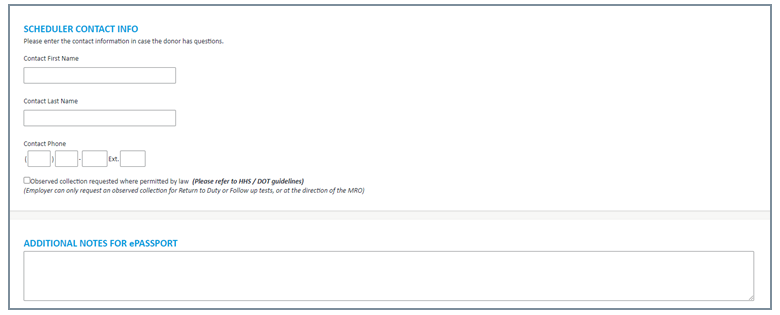
-
Prepare ePassport Notification
On the ePassport Notification option, include all email addresses that need to be notified, ensure they are separated by a semicolon (;).
A copy of the notification can be sent via text. Select the option to provide one cell phone number.
Copy Event.
If you have multiple requests, you will be completing for the same account, the Copy Event option will return you to Donor Information page to submit the next request.
On the ePassport, verify the Instructions for Service Provider are correct before submitting the request.
Image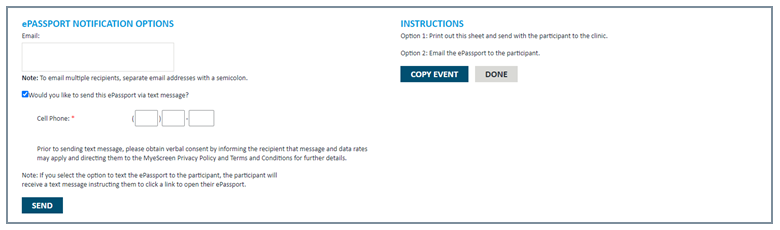
How to Request a Paper Chain
Paper Chain request should only be used when an eCCF is not available within a 25 Mile radius.
-
How to Order a Paper Chain on MYeSCREEN
- Select a Clinic.
- Verify there is no eCCF capable location within a 60-mile radius of the zip code.
- If no clinic is available, click "Request Follow-Up".
Image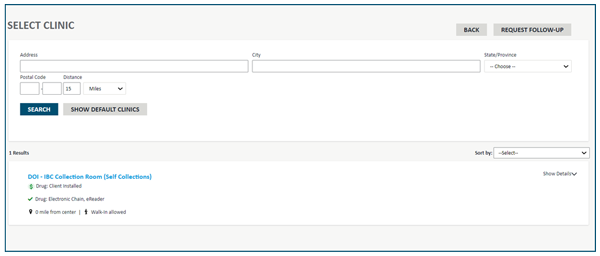
- Select the timeframe for how long the paperwork should remain active
- Determine the numbers of days for the paperwork to remain active. We recommended 14 days at a minimum. That will allow time for the paperwork to be processed, mailed, received at the collection site and give the donor sufficient time to report before the paperwork expires.
- Select Business days or Actual days to complete.
- Do not send a copy of the ePassport to the donor.
- We recommend sending a copy of the ePassport to yourself.
- Verify the scheduler's contact information.
- It the notes section should include the city, state & zip code to find the nearest facility.
Image
- Select confirm Request.
Image
-
Follow Up Actions
To track paper chain of custody form:
- Go to "Find/Edit Event".
- To find enter the donors last name or last five digits of the SSN.
- Select search.
- Click on the name of the donor.
- Scroll to the bottom of page to access the additional notes section. The additional notes section should contain the COC and FedEx tracking number.
- Access the FedEx website and track supplies using the FedEx tracking number.
- Once you confirm, via FedEx tracking, that the supplies have arrived at the collection site call the site to confirm receipt, verify clinics hours of operation and whether an appointment is required.
- Provide testing information to the donor.
- Instruct the donor to send you a copy of the chain of custody form that they receive from the collection site.
- As the scheduler you should maintain a copy of the chain of custody form for your records.